
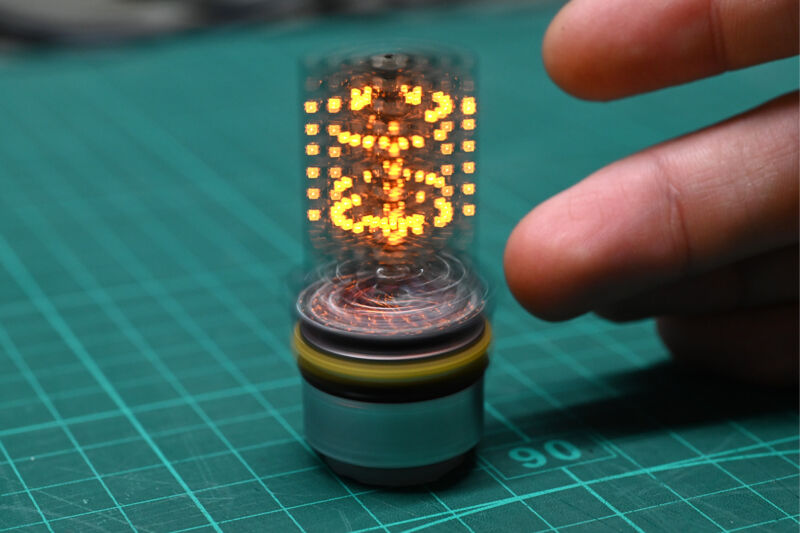
The latest device made by a prolific maker by mitxela includes an LED matrix panel, a “package of electronics” underneath, an infrared sensor, a coin-operated battery, and a drive from a CD-ROM drive. It’s a deceptively simple bill of goods A rather neat DIY project The size of a tea light candle.
normal Volumetric displays It’s tough stuff, given the need to send data and power to spin things up quickly. Metxilla’s solution: Make everything spin, including the battery. Mitaxila slipped the infrared sensor with his finger, moved the small spinning plate to create collapsing stars, poured out the liquid, and flamed the candle it was originally designed for.
A video that barely captures the bulky look of this LED display, but it still looks pretty sleek.
“I won’t deny, this is a very satisfying result for what was a hastily assembled prototype,” Mitxila says in the video. “I didn’t expect it to work at all.” The next version will have more LEDs, and they will be better centered; Currently, the back panel of the LED matrix is located on the middle line, not the LEDs themselves. Since the LEDs flash twice during each cycle, placing them exactly in the middle improves the clarity of the resulting image.
The battery fit snugly in the bottom case, but mitxela enjoyed holding the device while it was spinning so much that there were a few drops.
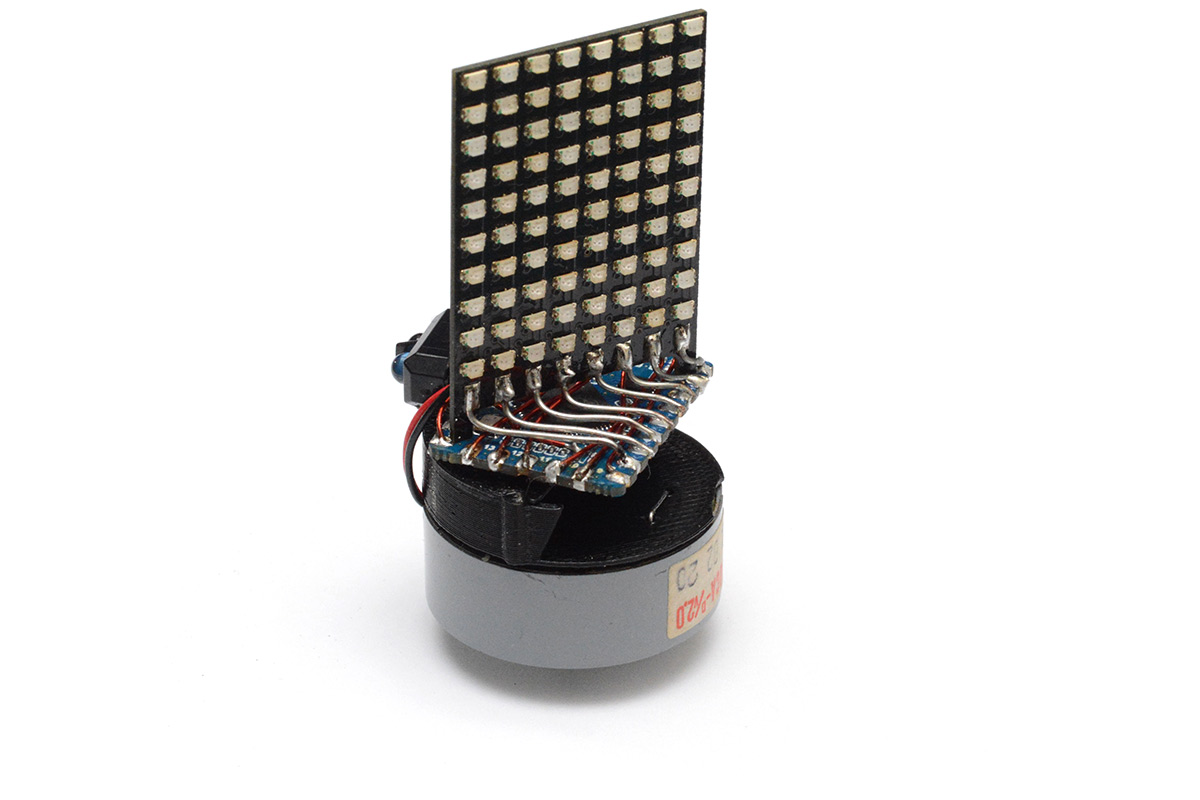
Mitxela’s blog post about the project It goes into more detail (nearly 5,000 words) about how it started, how it was made, and how it works. Key to the project was the “pick and place machine”, or automatic chip mounter, a Charmihai CHM-T36VA To mount individual LED spools in an array. Next, it was finding the right kind of microcontroller with enough flash memory for the volumetric image data but without much effort to actually program it. And it ended up being that RP2040-Small. Then there was the battery, which ended up being a rechargeable LIR2450, with a 3D printed stand.
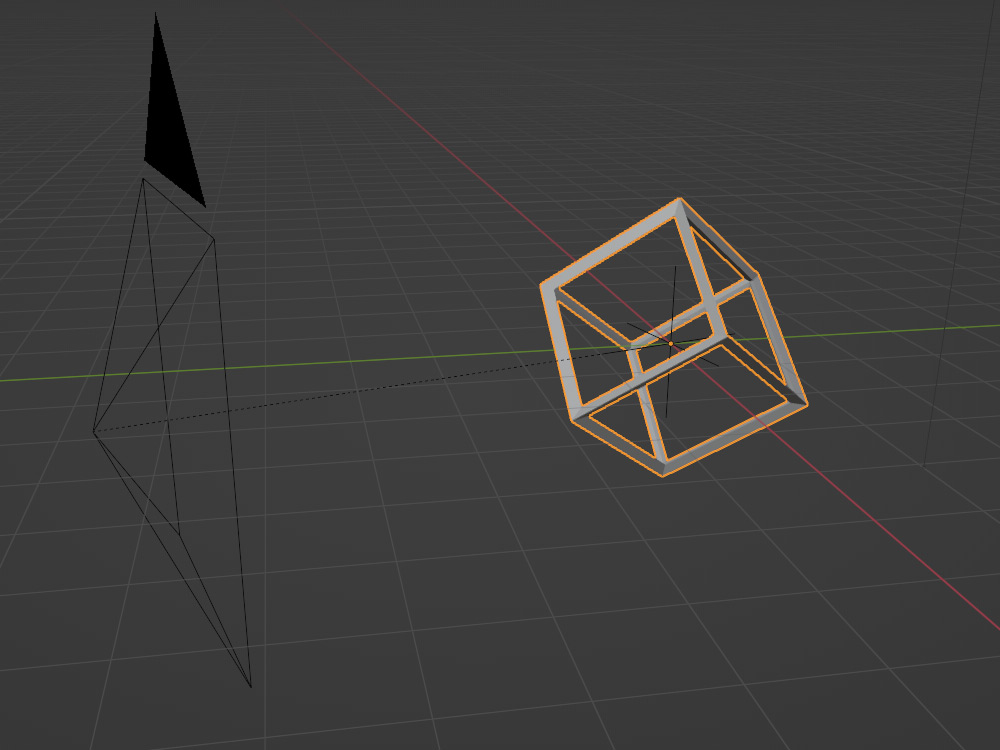
Creating 3D volumetric data in Blender. I suspect.
After soldering the TCRT5000 infrared sensor and finding a way to mount the array to the small board, Metxela had most of what he needed. Well, except for the software. I’ll admit here that I was somewhat lost trying to follow how the infrared sensor, the Pi’s microprocessor, the GPIO pins, and the “systick” function of the ARM Cortex-M0 chip worked together to create the rotating lights into recognizable images. There was also work done to protect the battery from reaching too low a voltage level, using a split USB port. And then creating volumetric data to interpret everything, which just means, you know, “applying Bresenham to 3D” and cutting it down to 24 slices per second for interpolation.
Mitxela has a lot of ideas on how to improve this gadget, including true remote control, easier battery disconnection, better LED alignment, and higher accuracy. to publish Source code on GitHubAnd everything else is documented in Blog post. If this is the first time you’ve discovered this site, be warned: it’s not a great idea if you have a lot of work due.

John Irving writes for Bjournal, covering news, politics, business, technology, sport, entertainment, and lifestyle. He focuses on clear, reliable reporting and useful information, helping readers stay informed about current events, emerging trends, and stories that matter.


More Stories
Apple iPhone 18 Pro Release Timeline: Why iOS 27 Points to a September Launch
Apple Unveils New Child Safety Features Across iPhone, iPad, and Mac
GoPro Mission 1 Pro Review: Premium 8K Action Camera Delivers Industry-Leading Video Quality